

Posted by Suuport staff on 13th Nov 2025
How to Reset Tachometer Needle Zero Position: Mechanical Calibration Guide
This procedure is rarely needed, but when it is, the mechanical fix is simple.
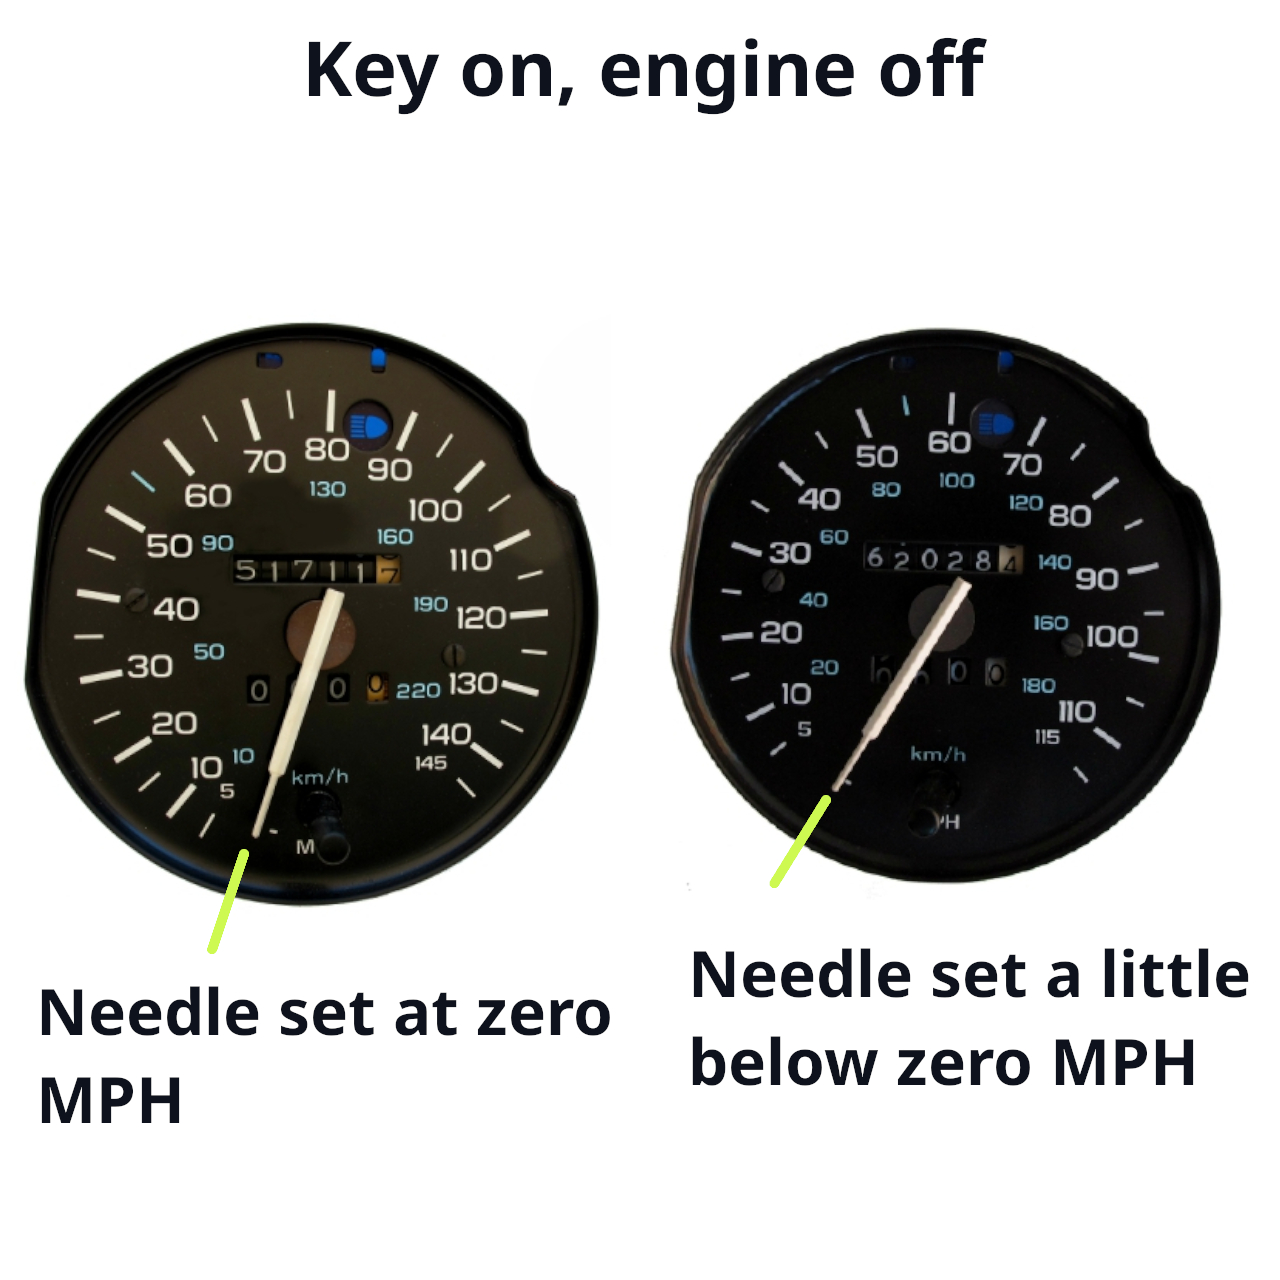
If your tachometer needle sits below zero when the ignition is ON, your needle is mechanically out of alignment. This cannot be fixed electronically—it requires a physical adjustment.
The Science: Why This Happens
The tachometer uses a two-coil air-core movement. When the key is turned to the ON position, these coils energize and automatically rotate the internal rotor shaft to the "Electronic Zero" point.
- The zero-RPM reference point is fixed by the circuit board design and cannot be adjusted via software or potentiometers.
- If the needle points below zero while powered up, the internal shaft is in the correct spot, but the plastic needle was pressed onto the shaft at the wrong angle.
Step-by-Step Mechanical Reset
Use a gentle lifting tool, like a common dinner fork, with a soft cloth underneath to protect the gauge face. Lift straight up—do not twist or pull aggressively.
Turn the Ignition ON (engine OFF). While the coils are energized, lightly press the needle back onto the shaft so it points exactly at 0 RPM. Do not press it all the way down yet.
Start the vehicle. Check the movement. If the needle rests at zero when you shut it off (Key ON), press it down firmly to lock it into its final position.