Posted by Support Staff on 19th Aug 2021
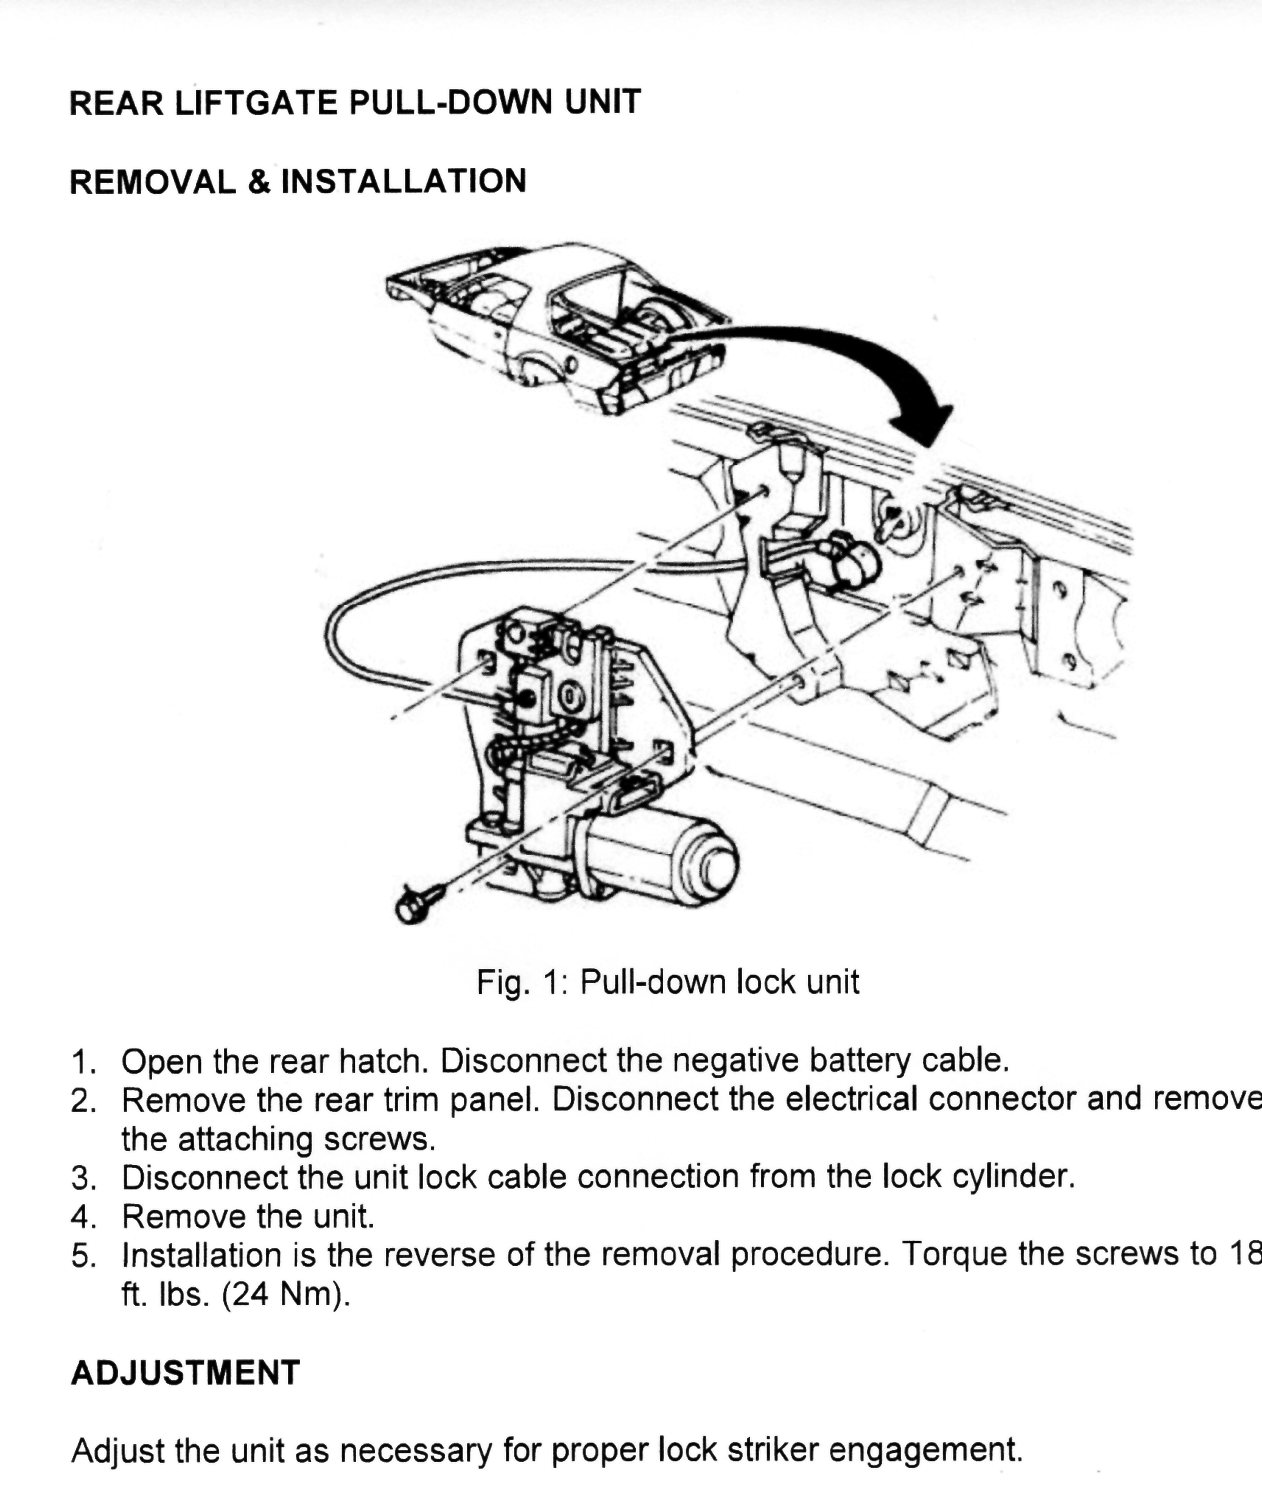
1991-92 Camaro and Firebird Pull-down Removal and Installation
Improper installation may cause damage, premature failure.
Please seek qualified help to install your Pull down if needed.
Below you will find the "repair manual procedure" + some important installation tips and an expanded alternate installation procedure.

The 4 most important points to avoid problems during installation is:
- Before installing the large rear plastic interior panel over the Pull-down, make sure the hatch is able to release and open properly.
- Do not install the Pull-down too low. This will causes the Pull-down to try to pull the hatch lid too tight and will over load the Pull-down assembly before it get to the lower shut off position. (Over loading the Pull-down may cause the vehicle's fuse to blow.)
- It is better to start with the Pull-down too high and gradually move it lower until you arrive at the correct position, than to start with the Pull-down too low.
- Pay attention to side to side positioning along with height positioning. Common symptoms of the the Pull-down being mounted to far to one side is incomplete release from the latch when opened, and the latch no fully seating when closed.
An expanded alternate installation procedure.
- Open rear hatch.
- Remove large rear interior plastic panel and set it aside.
- Remove old Pull-down Assembly unit. Note the location of bolts and electrical ground point.
- Position the new Pull-down in the approximate location is was before removal.
- Very lightly smug the three mounting bolts.
- Close the rear hatch using care not to close it too hard or damage to the Pull-down Assembly unit may occur.
- When the Pull-down Assembly unit has pulled down and shut off, have an assistant position the rear hatch centered between the two fenders and apply downward pressure on the rear hatch.
- While downward pressure is being applied to the rear hatch, loosen the three Pull-down Assembly unit mounting bolts from inside the vehicle. Center the Pull-down Assembly unit by looking at the latch. Apply downward pressure on the Pull-down Assembly unit and tighten the three mounting bolts.
- This should have provided proper alignment.
- Connect the Pull-down Assembly unit's electrical plugs.
- Install the Pull-down Assembly unit's ground wire.
- If equipped, install Key release (1986-92 models) or release Solenoid and Solenoid ground strap (1986-90 models)(Solenoid may not work properly without the ground strap installed.)
- Test for proper operation.
- Install the interior plastic cover.
IMPORTANT: Before installing the large rear plastic panel make sure the hatch is able to release and open properly. If you skip this step and the hatch does not open, and the large plastic panel is installed, the plastic panel will need to be cut.


