

Posted by Suuport staff on 13th Nov 2025
Calibrating the Tachometer Needle to the Zero Rest Position
This procedure is rarely needed, but when it is, the fix is simple.
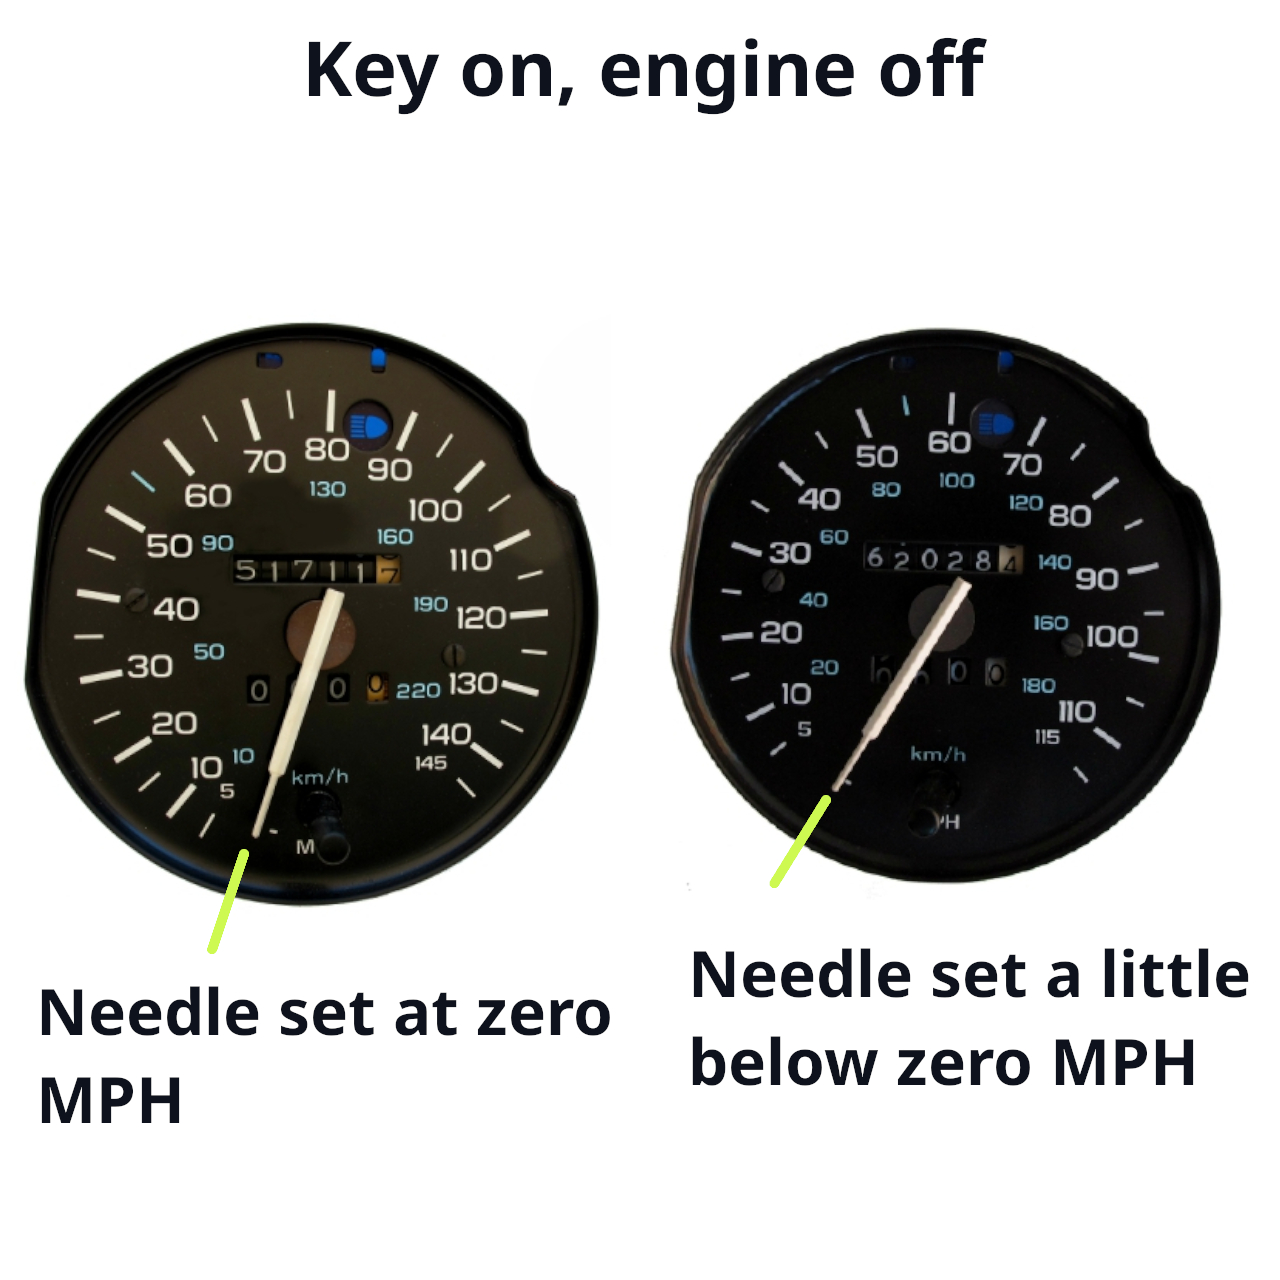
If the tachometer needle sits below zero with the ignition ON, the needle is installed in the wrong mechanical position. This cannot be corrected electronically.
Key Points
Understanding the Needle’s Zero Position
- The tachometer uses a two-coil air-core movement.
These coils energize and position a small rotor shaft whenever power is applied. - When the key is ON, the tachometer’s two-coil air-core movement energizes and automatically positions the rotor shaft at the electronic zero-RPM reference point.
This reference point is fixed by the circuit board design and cannot be adjusted electronically, because the air-core movement is calibrated to rotate a specific amount in response to the RPM signal. If the needle rests below zero with power applied, the rotor shaft is correctly positioned at zero — but the needle is installed in the wrong physical position on the shaft. - The zero-RPM reference point is not user-adjustable.
The circuit board and air-core movement determine the zero position. You cannot change this with any electronic adjustment or calibration. - If the needle sits below zero with the key ON, the shaft is correct but the needle is not.
A below-zero reading with power applied means the needle is installed in the wrong physical position on the shaft and must be repositioned mechanically. - Correcting a below-zero needle requires mechanical adjustment.
The needle must be carefully removed and reinstalled so that, with the key ON and engine OFF, it rests exactly at the zero RPM mark.
How to Set the Needle to Zero
- Remove the needle carefully.
- Use a gentle lifting method—such as a dinner fork with a soft cloth under it—to avoid damaging the gauge face or internal mechanism.
- Do not twist or pull aggressively.
- Reinstall the needle at zero.
- Turn the ignition ON (engine OFF).
- Lightly press the needle back onto the shaft so it points exactly to 0 RPM.
- Only press it on lightly at first so adjustments can be made.
- Verify the needle movement.
- Start the vehicle and slowly raise and lower the RPM.
- Because the needle is only lightly installed, make RPM changes gently to avoid shifting it unintentionally.
- Fine-tune if necessary.
- It is normal to need a couple of tries to get the zero position perfect.
- Remove and reinstall again if needed.
- Lock in the final position.
- Once you’re certain the needle rests at zero and moves correctly during RPM changes, press it on firmly to seat it fully.
Final Step
You are done. If your tachometer circuit board requires additional calibration, follow the calibration instructions included with your circuit board. (Rarely needed)